Friday, October 26, 2012

Gomukhasana or "Cow Face Pose"


Sanskrit: Gomukhanasana                                                           Western Term: Cow-Face Pose

Origin of Word Go = cow; Mukha = face


Saying “moooooooooo” may help release tension from mind and body, it also may help with breath

Type of Asana: seated pose


How To:
1.     Sit on the ground with your head and spine erect. Extend both legs straight out in front of you in dandasana  (staff pose). Place your palms down on either side of your hips bringing the weight into your hands. Raise your body above ground level so that you can bend your right leg backward and sit on your right foot. Using the help of your hands (if necessary), bend your left leg so that your left knee is over your right knee and the left heel touches the right heel (or lower part of your right thigh in early stages).
2.     Inhale as you reach your right arm out to the side. Exhale bending the right arm at the back, bend the arm at the elbow and lift the forearm upward. Lift your left arm over the shoulder, bend it at the elbow and place the left hand at the back below the neck. Try to connect the fingers of both hands behind the shoulder blades with your head upright.
3.     Stay in the posture for about a minute or until your breaking point (you’ll know your breaking point, each person has a different point).
4.     Make sure to do both the right and left leg and arm.


Body Points:
*keep knees on top of one another keeping sits bones grounded
*stay tall in the spine with elbows coming toward the back wall
*engage core, keep rib and hip connection


 Emphasized Body Parts: legs (gluteus maximus & vastus lateralis), arms (biceps, triceps, brachioradialis) and upper body (latissimus dorsi and pectoralis major)

Physical Benefits:
-decreases cramps and sprains
-increases strength of bones and flexibility of joints in legs and arms
-aids in treating digestive disorders when in full posture
-the total expansions of the chest help the lungs and hearts
-the complete extension of the spine helps the back

Mental Achievements: encourages you to surrender physically and mentally into your sensuality and pleasure


An aid for beginners: kramas or levels of a pose give us yogis with various levels options. For any given pose, there are various levels of difficulty. This krama that I offer is for beginners to the pose: it is often difficult to get both sits bones to rest evenly on the floor, which in turn makes it difficult for the knees to stack on top of each other. If the pelvis is tilted, the spine can’t extend properly. Use a folded blanket or bolster to lift the sits bones off the floor and support them evenly. Also use a strap, if you can’t connect both hands together.


Option for more advanced yogis: after crossing legs and getting arms in position, lean forward and lay the front torso down on the inner top thigh. Stay for 20 seconds, inhale and come up. Move the hands away from the torso if you’re extra bendy in the shoulders and armpits.


Chakra: 2nd chakra, Svadisthana Chakra, that correlates with the hips, sacrum, and genitals. It is located in the lower abdomen and pelvis. The second chakra allows emotional and sensual movement in life, opening one up to pleasure, and learning to “go with the flow.” This chakra is involved with sensuality, sexuality, emotions, intimacy, and desire. This chakra is symbolized by a six-petaled lotus and the color orange.

Want to get your groove on? Bija mantra: “vam” to connect to your sensuality

Yeah, that's groovy 

Ancient Sanskirt Proverb: “Hunger, thirst, and desire are like a man’s wives. They do not desert a man throughout his life. Of them, desire is the most faithful. Others leave at least temporary after eating and drinking.”

Element: Water


*Modify or do not do this pose if you have serious neck or shoulder problems

Indulge in pleasure and enjoy a sensual meal. This recipe that I created is healthy and easy to make.


Ingredients: brown rice and quinoa, squash, green beans, asparagus, tomato, mushroom, red onion, spinach, cucumber, olive oil, salt, pepper
1.     Cook brown rice and quinoa in large pan with oil and water
2.     Chop squash, green beans, asparagus, tomato, mushroom, red onion, spinach, and cucumber
3.     Cook squash, green beans, and asparagus in separate pot with boiling water
4.     Add all veggie ingredients into brown rice and quinoa to allow juices to cook together for more flavor
5.     Add spices as wished
Jasper gives it a thumbs up approval

6.     Enjoy your quinoa veggie dish! 


Moooooooove toward sensuality and pleasure with cow face pose and have a Happy Halloween!!!


Sources:
Mira, Sylva & Mehta, Shyam. “Yoga the Iyengar Way: the new definitive illustrated guide.” Forwarded by B.K.S. Iyengar. US, New York: 2010.


Friday, October 19, 2012

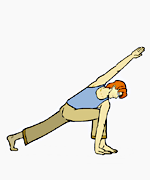
Parivrtta Parsakonasana or Revolved Side Angle


Sanskrit: Parivrtta Parsvakonasana            Western Term: Revolved Side Angle

Origin of Word parivrtta = revolved; parsva = side; kona = angle


You know you’re a dork when you put math jokes into a yoga blog. Oops.

Type of Asana: Standing Pose


How To:
1.     Standing in tadasana (mountain pose). Inhale and jump legs 4-41/2 feet apart and stretch arms sideways. Turn the left foot about 60º angle and the right foot at a 90º angle. Line the front heel with the middle arch of the back foot. Extend the spine up.
2.     Turn the left let in and bend the right leg to a right angle, squaring the hips and turning the upper body to face the right leg. Keep the coccyx facing directly back and the middle of the pubis and sternum facing ahead.
3.     Exhale to turn and bend the left side of the body toward the right leg. Bend the left arm and place it against the right outer knee with the forearm and hand stretched. Place the right hand on the right hip and tuck the hip in toward the coccyx (in order to keep the coccyx centered). Press the left upper arm agains the thig to bring the left side of the chest to the right. Squeeze the abs up and away from the right thigh. Extend the front of the body revolving the right side of the upper body up and back, opening your chest up towards the ceiling.
4.     Stay for 20-30 seconds (roughly 5-7 breaths). Repeat on opposite side.

Body Points:
*Front thigh down
*Back thigh lifting
*Upper body rotating and extending

 Emphasized Body Parts: stretches: spine, chest, back, legs, and groin. Strengthens the knees, ankles, and leg muscles.  Enhances the body’s stamina, sense of balance, and digestive functioning.

Mental Achievements: Seeking achievement? Revolved side angle connects to the third chakra, which cultivates radiance, strength, and confidence.


To quote a man famous for grabbing his crouch and the moon walk: “My attitude is that if you push me towards something that you think is weakness, then I will turn that perceived weakness into strength.” –Michael Jackson, may he rest in peace


I mean that takes balls. 


Moving on to modifications…this is that part of yoga that gives you a chance to cultivate your body awareness. Find your edge, work-perhaps even harder than you thought you could in the pose, but also honor your body and where it is that day, year, hour of your practice.

Beginner Modification: kramas or levels of a pose give us yogis with various levels options. For any given pose, there are various levels of difficulty. This krama is for beginners to the pose:

-Drop the back knee on to the floor for more support


OR

-Raise the back heel off the floor.


Option for more advanced yogis:
This krama that I offer is for yogis looking for a bit more heat, and feeling very open in the shoulders:
-Straighten the left arm and place the hand on the floor, but do not lose the lift and turn of the upper body. As the right shoulder goes back, stretch the right arm up and over the ear with the palm face down. Take the head back and look up.


-If you’re looking to go even deeper start to connect the right and left hand behind the back, taking a bind.


Chakra: Manipura chakra, the third chakra in the solar plexus behind the navel. It is symbolized by the color yellow located between the navel and breast-bone. Connect to your manipura chakra with revolved side angle and transfer your energy into action.


Ignite your fire within by repeating the bija mantra “ram” while in third chakra poses.
And if that mantra doesn’t work for you, perhaps this hot song will (at times, even listening to the words makes me sweat… awkward)


Ancient Sanskirt Proverb: “Person with enthusiasm is a powerful one. There is no power equal to will power. For person with enthusiasm and will power, there is nothing that is difficult.”

Element: Fire

Twists not only massage internal organs, but also help to detoxify the body. They can be quite intense. It is not surprising that you may be very hungry after a practice with many twists. So, here is this week’s guilt-free recipe that Jasper and I created this past Saturday when my best friend, Caitlin, came to visit us. It’s easy to whip up and delicious. Just look at how happy they are (or how pissed at me they will be when they see I posted this candid bootyful picture on my blog)


Ingredients for lentils dish: lentils (2-3 cups), potatoes (5), red peppers (1/2), spinach(2 cups), onion (1/2), and coconut oil.


Ingredients for salad: spinach, spring lettuce, tomatoes (1) , red onion (1/2), red pepper (1/2), baby carrots (10), Spanish almonds (10-12), avocado (1), cucumber (1/2), croutons (10-12), feta cheese (sprinkle as preferred)


Twist (but try not to shout) in Revolved Side Angle and have a good weekend! 


Sources:
Mira, Sylva & Mehta, Shyam. “Yoga the Iyengar Way: the new definitive illustrated guide.” Forwarded by B.K.S. Iyengar. US, New York: 2010. Page 36-37.


Friday, October 12, 2012

Pascimottanasana or Seated Forward Bend


Sanskrit: pascimottanasana                                                 Western Term: seated forward bend

Origin of Word: pascima = back; uttana = extension

Type of Asana: sitting pose


How To:
1.     Sit in dandasana (staff pose). Exhale as you lean forward, extend your arms, and reach for the feet. Inhale to pull on the feet (pinky-toe-side-of-the foot) or lateral side of the legs while extending the upper body up from the pubis. Stretch both sides of the pubis and open the chest. Make the bag concave and look upward.
2.     Exhale to bend the elbows outward. Move the pubis back in order to bring the hips closer to the thighs. Open the sits-bones away from each other. Simultaneously extend the front, sides, and back of the body toward the legs.
3.     Rest the head on the shins, preferably the chin to the shins. Keep the head and back relaxed. Stay for 30-60 seconds.
4.     Inhale to come up.


Body Points:
*Keep the feet and ankles together and keep the feet flexed to stretch the Achilles Tendon.
*Maintain the extension of the legs and trunk without becoming tense.
*Don’t let the legs roll outward. Pull up on the outer thigh muscles and keep the knees pressing down. Keep the head and upper body relaxed on the legs.
*Use your breath to help you find yourself deeper in the pose. On each inhale come into flat back and on each exhale fold a bit deeper over the legs.


Emphasized Body Parts: Hip flexors, hamstrings, spine, and muscles of the feet

Mental Benefits: calms the mind and improves concentration

Git rid of that belly with pascimottanasana


Other Benefits of the Pose:
-this posture is good for reducing belly fat and extra weight from the hips
-recommended for women after delivery or during menopause because it helps to strengthen and slim shape
-liver, kidneys, pancreas, and ovaries benefit from this pose-giving your digestion and appetite a boost
-helps regulate blood pressure

An aid for beginners: kramas or levels of a pose give us yogis with various levels options. For any given pose, there are various levels of difficulty. This krama that I offer is for beginners to the pose: use a chair pushing against the wall. Sit on the edge of the chair and bend down over the legs, gravity will help you bend over further. Keep hands on the floor.

A restful variation


A restful variation on the pose (for all levels): Use a blanket or small stool folded on the shins. Rest the forehead on the folded blanket or stool and stay for 2-3 minutes. Do not strain the back.


Chakra: Muladhara chakra; solar plexus center. First chakra which is red and symbolized by a four-petaled lotus.
Stimulating the first chakra with poses like pascimottanasana help build a strong foundation.
Seed sound (bija mantra): Lam, repeat the mantra while in the pose and come closer to unlocking the secrets of the earth


Ancient Sanskirt Proverb: “Regular exercise gives you good health, longevity, strength, and happiness. Health is the biggest wealth. It is the key to every success.”

Element: Earth

*Avoid doing this pose if you suffer from back injuries or diarrhea


Pascimottanasana helps to stimulate the digestive qualities in the tummy and rev up your metabolism. Perhaps you’re hungry? Maybe even ravenous? Here is a not-so-guilt-free recipe that I did not create. In fact, Trader Joe’s, one of my favorite places, are the creators of this fall-time dish. It’s easy to whip up, a bit sinful, and absolutely delicious.


Ingredients:
1.     Trader Joe’s pumpkin pancake/waffle mix (I believe, it’s only sold during the fall because it’s such a seasonal dish)
2.     2 Tablespoons Melted Butter
3.     ¾ Cup Milk
4.     1 Egg, lightly beaten
5.     Real Maple Syrup (don’t buy the fake stuff. It tastes grosser and is worse for you)

Add strawberries to make yourself feel a bit healthier ;)


Enjoy the foliage and have a good weekend! 


Sources:
Mira, Sylva & Mehta, Shyam. “Yoga the Iyengar Way: the new definitive illustrated guide.” Forwarded by B.K.S. Iyengar. US, New York: 2010. 

Friday, October 5, 2012

Bakasana or "Crow Pose"


Sanskrit: Bakasana                                    Western Term: Crow or Crane (with straight arms) Pose

Origin of Word Baka = a crane. The pose imitates the shape of a bird, using the arms as the legs.

Type of Asana: Balancing Pose


How To:
1.     Start standing in Tadasana (mountain pose, standing tall with feet parallel or ankle bones touching-for this bone it is better if ankles bones are teaching and feet are together).
2.     Bend over, so that hands are in front of feet down folding into utanasana (forward bend) with a flat back.
3.     Bend the knees and elbows to the side. Lean forward taking the head and chest down. Kneel bringing the knees up towards one’s armpits, keeping the legs on the outside of the arms. Plant the palms of the hands firmly on the floor spreading the fingers.
4.     Engage your core, come onto the balls of the feet, keeping the gaze (or drishti) on the floor in front of you for balance. Lift one foot at a time, find balance on the palms of the hands and keeping the feet together or crossing them at the ankle.
5.     Work towards completely straightening the arms while balancing (which is a more advanced version of the pose referred to as crane pose). Hold for about 5 breaths.


Above is an incredibly dorky picture of me in crow pose in Argentina. I had to wear the weird earmuff headband because it was freezing. And they looked less bad hanging there on the rack in the market where me and my best friend, Katie, found them.

Body Points:
* Keep the feet lifted and do not let the legs slip down
*Keep the back rounded and contract in the abs (engaging uddiyana bandha-an upward abdominal lock)
*Keep the upper arms stretching and lengthening


 Emphasized Body Parts: core, arms-especially strengthens wrists, shoulders, neck, and forearms. It also kick starts your respiratory system into proper function and massages the organs of the abdomen. It even has healing qualities for those with diabetes.
Practice crow pose enough and you could end up looking like Marge Simpson on steroids.


Okay maybe not that extreme…but it will increase your muscle definition.
Mental Achievements: Increases both mental and physical balance, concentration, trust, and tranquility
An aid for beginners: kramas or levels of a pose give us yogis with various levels options. For any given pose, there are various levels of difficulty. This krama that I offer is for beginners to the pose: start by practicing balancing on the palms of the hands using a block. Learn to balance on the block and feel the lightness in the pose before fully straightening the arms. Also place a blanket in front of your hands, just in case you tip over onto your head.


For advanced practitioners: To add some heat to the pose (if for some inexplicable reason it is lacking-and more power to you), try moving from sirsasana or tripod headstand into bakasana or crow pose. You should definitely be feeling some heat moving in between these two poses.


Chakra: The root chakra or muladhara chakra  focuses on security and stability.


This chakra is a red-four-petaled lotus located at the base of the spine. This chakra helps you build a solid foundation. The seed sound or bija mantra of this chakra is “Iam” which helps unlock the secrets of the earth.

Element: Earth


Ancient Sanskrit Proverb: “Regular exercise gives you good health, longevity, strength, and happiness. Health is the biggest wealth. It is the key to every success.”

*Do not do this pose if pregnant or carpel tunnel syndrome*

Continue connecting to your root chakra with hearty root vegetables. They’re delicious, filling, but don’t make you feel weighed down after eating. Here is a recipe that Jasper, my boyfriend, and I whipped up. As he put it: “You (Chauncey) create the healthy half of the meal and I (Jasper) make the fattier, slightly less healthy, part of our feast.” Eloquent and to the point-that’s my boyfriend J Jasper made home fries with onions and peppers. I made a big green salad. Here are our quick and rather healthy (even Jasper’s home fries) recipes:


Ingredients for Jasp’s home fries: potatoes, red pepper (or green or yellow if you like), onion, coconut oil, salt, pepper
1.     Chop potatoes (about 2-3), red peppers (1/2), and onion (3/4)
2.     Add coconut oil (a healthier option than olive oil) to frying pan and sauté potatoes, onion, and peppers until potatoes are golden brown
3.     Add salt and pepper as liked. Option to add ketchup or hot sauce too!

Ingredients for ChaCha’s Salad: organic spring mix lettuce, red pepper, red onion, carrot, sundried tomatoes, avocado, tomatoes, broccoli, Spanish almonds, croutons, feta cheese, olive oil, balsamic vinegar, grey poupon mustard, salt, pepper
1.     Chop red peppers (1/2), red onion (1/2), sundried tomatoes (5-6), avocado (1), tomato (1), broccoli (1/2 a head of broccoli), carrots (8-10 baby carrots)
2.     Wash spring mix lettuce
3.     Place lettuce and chopped veggies in a large salad bowl. Sprinkle feta cheese, Spanish almonds, and croutons as preferred.
4.     Mix olive oil, balsamic vinegar, and grey poupon with salt and pepper in a small bowl for vinagrette
5.     Drizzle dressing over salad and toss ingredients. Enjoy! (Even Jasper, Mr. Meat-Eater, liked this veggie delight)

Take flight crows!


And have a good weekend!


Sources:

Friday, September 28, 2012

Navasana or "Boat Pose"


Hello fellow blog-readers:

I’m so sorry that I have not kept a constant blog for you all to read this past summer. In my attempt to make amends for my flaky blogging, I offer a commitment to a constant blog that will come out weekly on Fridays. As in life, my blog has evolved into a new more mature being. As a yoga teacher, I’ve decided that The Elegant Klutz blog will now focus on as much information about a specific exciting yoga pose, include an alternative mind body form of the pose, and finally offer a healthy recipe to enjoy upon conquering the pose. The information about the pose comes from sources, which I have listed for your own perusal, and my own experiences with the pose. I hope you enjoy the constantly maturing Elegant Klutz.

Namaste,
Chauncey “ChaCha”

Sanskrit: Paripurna Navasana                                      Western Term: Boat Pose

Origin of Word = Paripurna: full, nau: boat

Type of Asana: Sitting Pose


How To:
1.     Start in dandasana (staff pose-with legs extended out in front of you, feet flexed grounded into the sits bones)
2.     Exhale to lower the back about 30 degrees and legs about 60 degrees; at the same time raise arms to shoulder level stretched toward the legs
3.     Balance on the front of the sits bones. Lift the chest and look toward the feet, but do not tense the abs. I often feel off balanced when I first try to balance on my sits bones. It helps me to balance by inhaling deeply and focusing on expanding my chest/heart chakra open towards my feet and the sky.
4.     Stay 20-30 seconds breathing in and out evenly before coming down. Keeping the breath even also helps balance the body and mind in difficult poses rather than sending your body into alert and losing balance. 

Body Points:
*keep arms parallel to the floor
*lower back lifting
*breath (every yoga teacher says it about a million times a class, but there’s a reason for that- it’s important and breath actually helps calm the body, even in moments when your muscles may be screaming for the opposite of relaxation)

Emphasized Body Parts: abdomen/core, hip flexor, and spine
The core strength that we build in Navasana helps yogis support our lower backs. In yoga “core” is more than the physical abs. B.K.S Iyengar says: “practice leads you on an inward journey from the periphery of your body to the core of your being.”

Mental Achievements: determination, stamina, and boldness of spirit
Your spirit may become as bold as Tina Fey’s persistence to express herself through dorkalicious dance moves like in 30 Rock. Don’t understand that reference, click below and you will:

Damn Tina Fey can dance. And yeah…that’s bold spirited.

An aid for beginners: kramas or levels of a pose give us yogis with various levels options. For any given pose, there are various levels of difficulty. This krama that I offer is for beginners to the pose: keep arms on the floor until legs and trunk are balanced. Go in and out of the pose with bent legs. Don’t get down on yourself for being in a beginner state. We all need various levels of intensity depending on the given day.

Chakra: Boat pose engages your third yellow chakra called Manipura. Confidence, energy, and strength are found in the third chakra. Each chakra has a “seed sound” or bija mantra which engages the essence of the chakra. While in third chakra poses like boat pose repeat the mantra “ram” to ignite the fire within. Personally, I encourage you to try this audible mantra while at home in a private practice rather than a group yoga class as to not disturb your neighbors.


Ancient Sanskirt Proverb: “Person with enthusiasm is a powerful one. There is no power equal to will power. For a person with enthusiasm and will power there is nothing difficult.”

Element: Fire is the element found in the third chakra and ignited while in boat pose.


The burning sensation in your abs may feel like fire-a helpful reminder of the element associated with the pose. Don’t worry! With time, the pose will get better and help build your strength and confidence, not only physically, but also mentally as you take these lessons from the mat out into the world.

Alternative: If yoga isn’t your preferred mind body practice, pilates is an alternative that has similar poses to yoga. In pilates the boat pose equivalent is called “the teaser.” The teaser is very similar to navasana but rather than holding the pose, it is about sequential movement in and out of the pose. Boat pose is holding the pose. 

Yoga's  Navasana or "Boat Pose"

The teaser is movement.

Pilates' "Teaser Pose"

Both yoga and pilates have their own benefits, so get out and try both. Find what works for you and cultivate your inner and outer strength.


After an intense practice, the fire in your belly will most likely rev up your metabolism and leave you rather hungry, maybe even ravenous. Here is a guilt-free recipe that I created. It’s easy to whip up and delicious.


Ingredients: Quinoa, Spinach, Sundried Tomatoes, Potatoes, Onion, Garlic, Olive Oil, Salt, & Pepper
1.     Boil quinoa in water for 15-20 minutes
2.     Cook spinach, sundried tomatoes, potatoes, onion, garlic, olive oil, salt, and pepper in large frying pan (takes about 5-10 minutes)
3.     Add quinoa to large to allow vegetable juice and flavors to absorb into quinoa and stir (5-7 minutes)
4.     Add parmesan, salt, & pepper on top as preferred
*If you’re a meat eater, add bacon crumbled on top. You can add bacon to the frying pan with quinoa and veggies to allow bacon flavor to absorb.

Namaste until next Friday! 


Sources:

Cummins, Claudia. http://www.yogajournal.com/basics/1193 Viewed 9/25/12.

Degenhardt, Benjamin. http://benjamindegenhardt.com/2011/10/28/pilates-and-yoga/ Viewed 9/25/12.

Mira, Sylva & Mehta, Shyam. “Yoga the Iyengar Way: the new definitive illustrated guide.” Forwarded by B.K.S. Iyengar. US, New York: 2010. Page 58.